How to Make a DIY Flower Wall
My twin, Caitlyn Poli and I spent some time with Viktoria Dahlberg, in her Williamsburg apartment, and made a flower wall for a collaboration with Urban Outfitters you won't soon forget.


Follow the steps below to be able to transform a blank space into your own gorgeous garden on a wall.

SUPPLIES NEEDED
About 4-5 bouquets of flowers or faux flowers (this will differ depending on how big you want your flower wall to be)
Gaffer tape (you can easily order on Amazon) — I suggest white tape, if you have white walls and rather the tape be less visible.
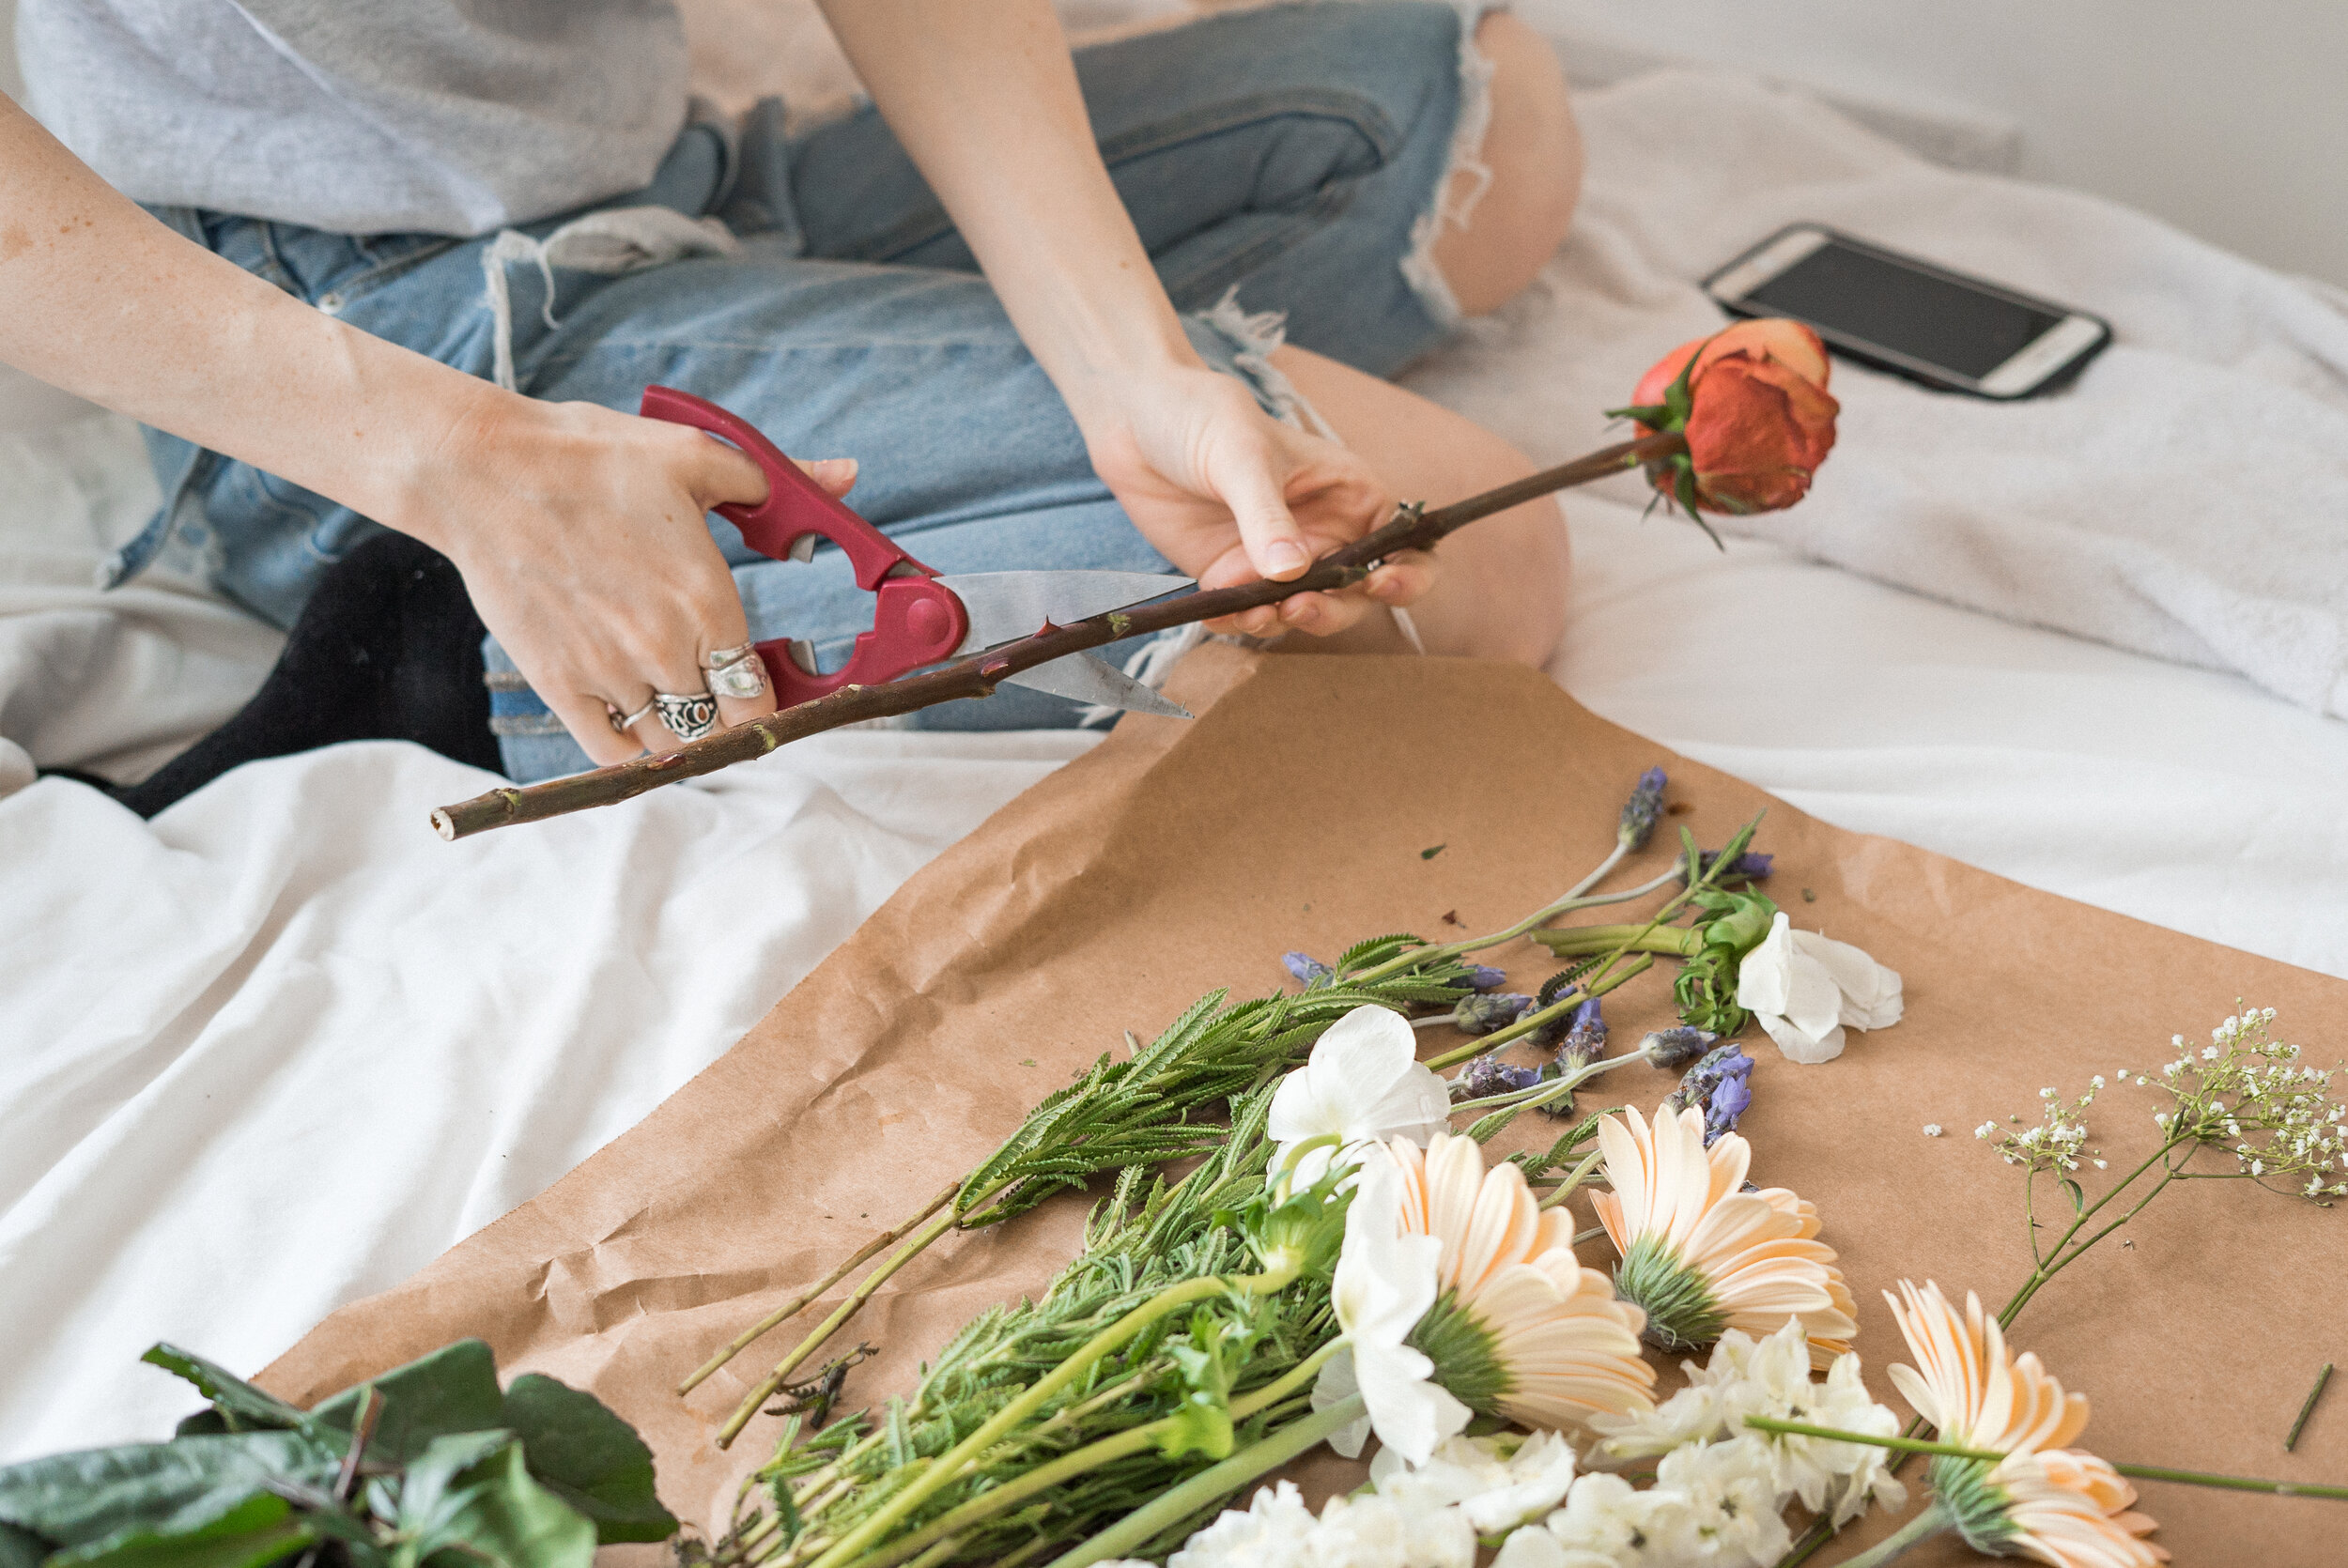
Scissors (preferably floral/pruning shears, but regular scissors should work too)
Something to lay your flowers on — an old sheet, towel, or cardboard works just fine.


STEP 1
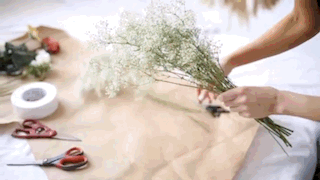
To start, lay out your flowers on a towel and cut away any pieces of the flowers you don't want. This can get a little messy so I suggest having a trash bin or bag handy to throw out all the scraps, and keep things organized.
While I used all real flowers for this wall they do not last very long (about a week or so). To get a more long term look, you can use faux flowers. which many stores have, such as West Elm’s faux botanicals collection.
You could also use dry flowers such as lavender and baby's breath. I suggest getting a variety of different flowers and spreading them out as you hang.
STEP 2
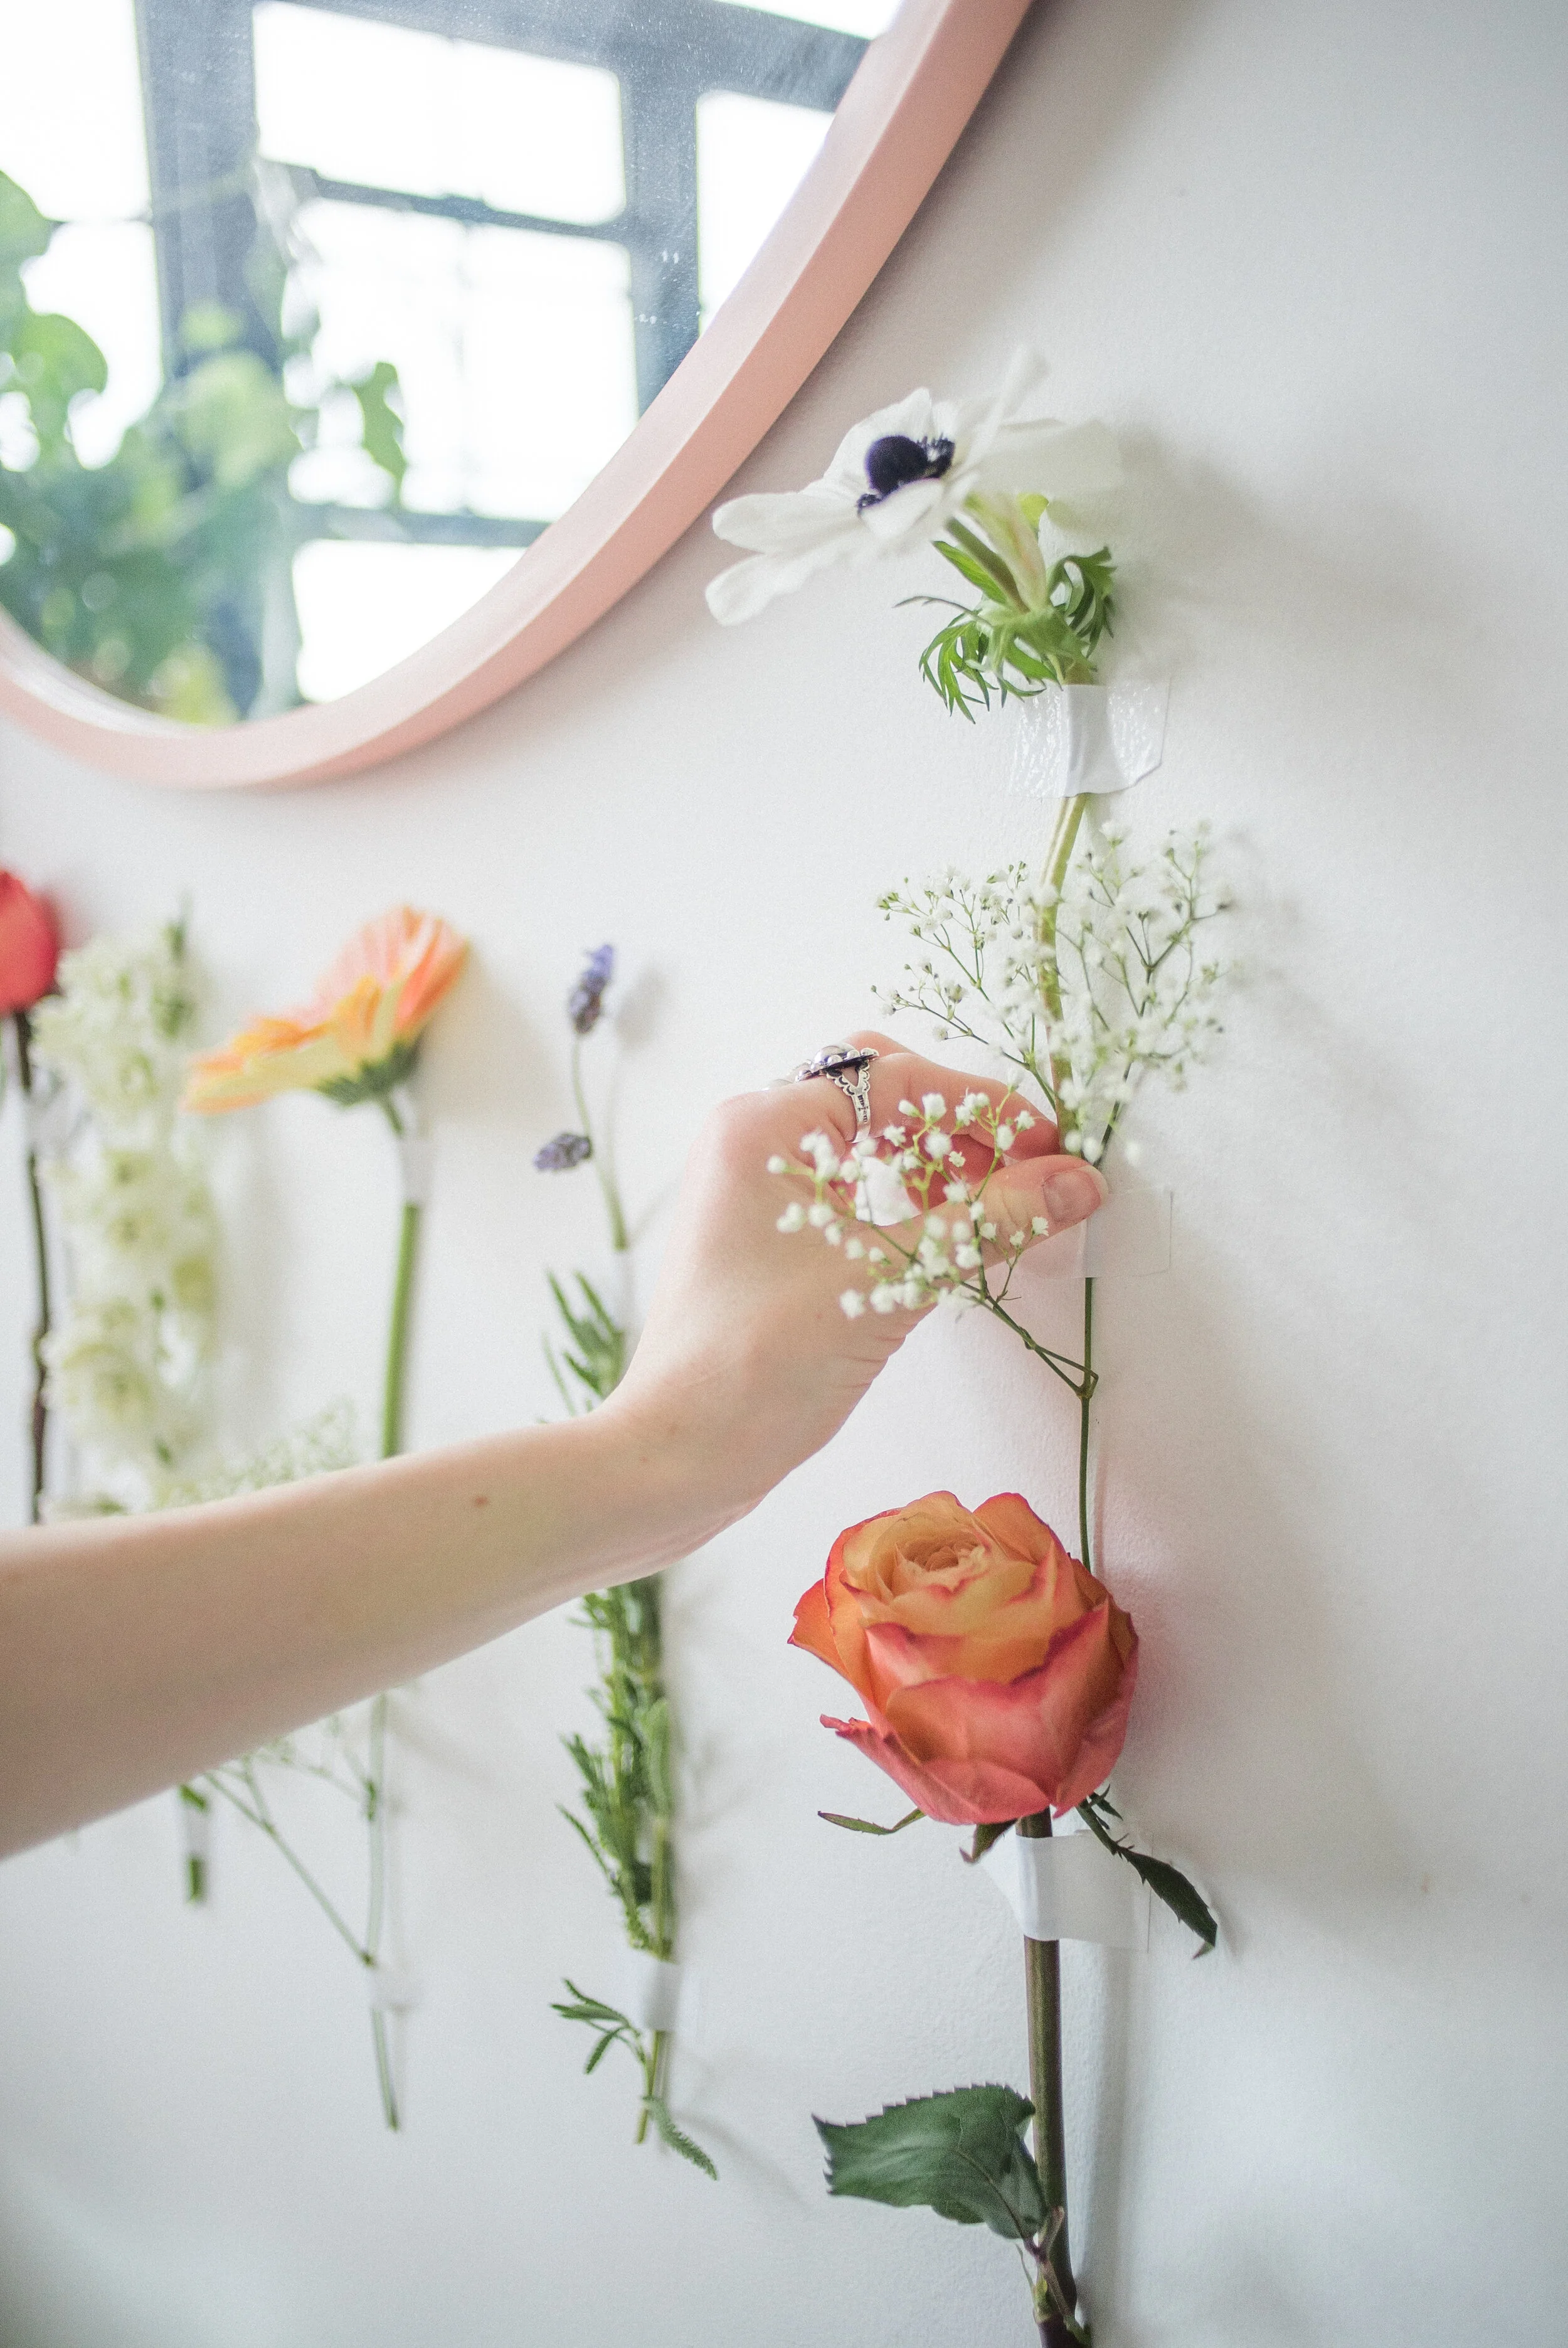
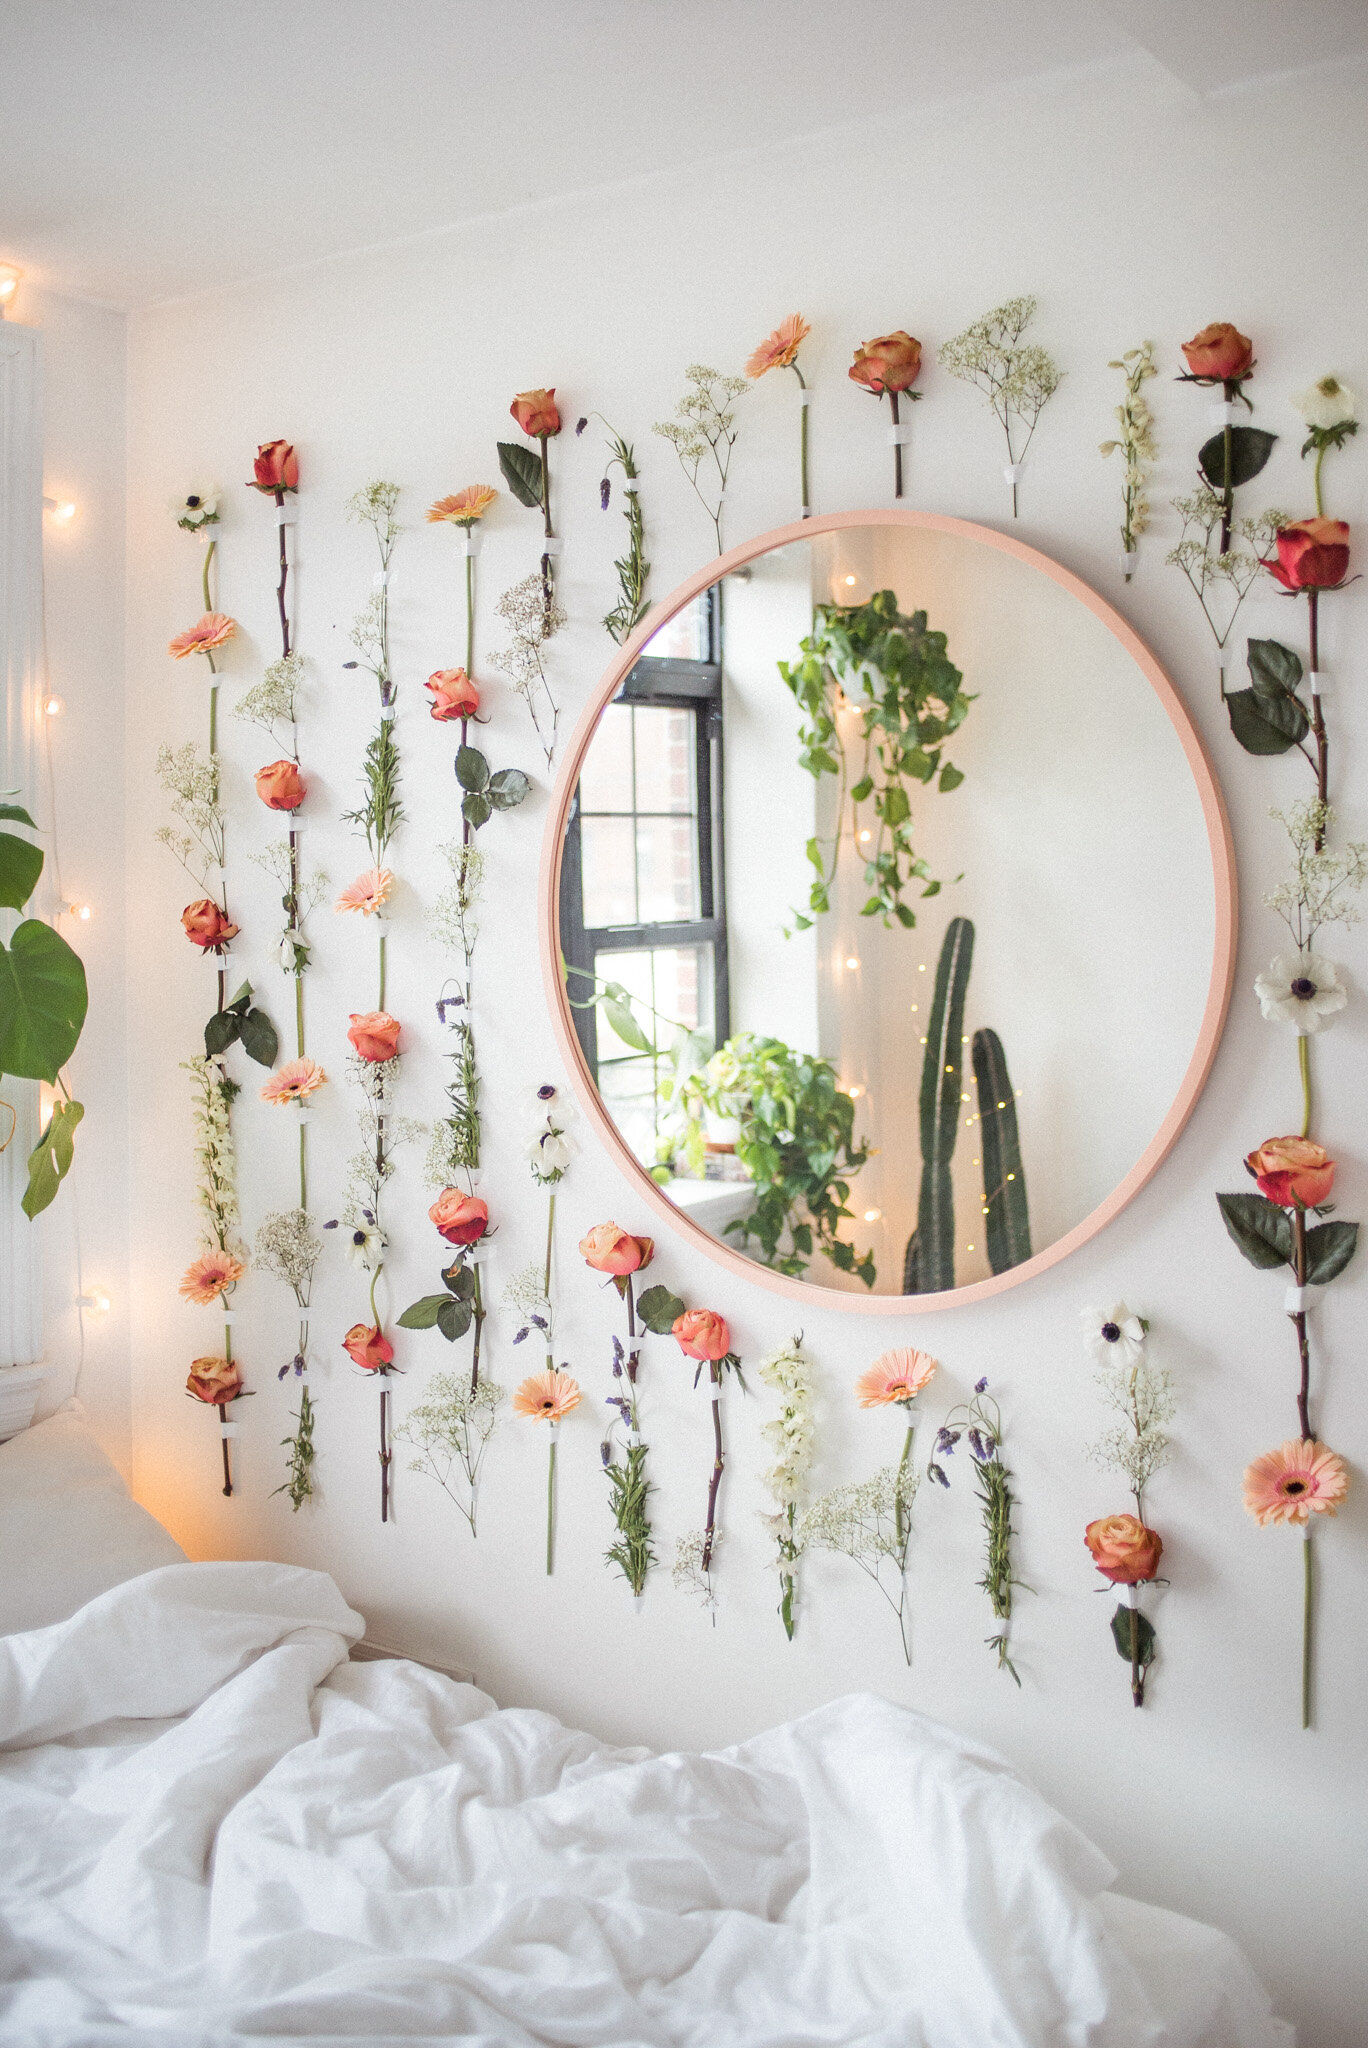
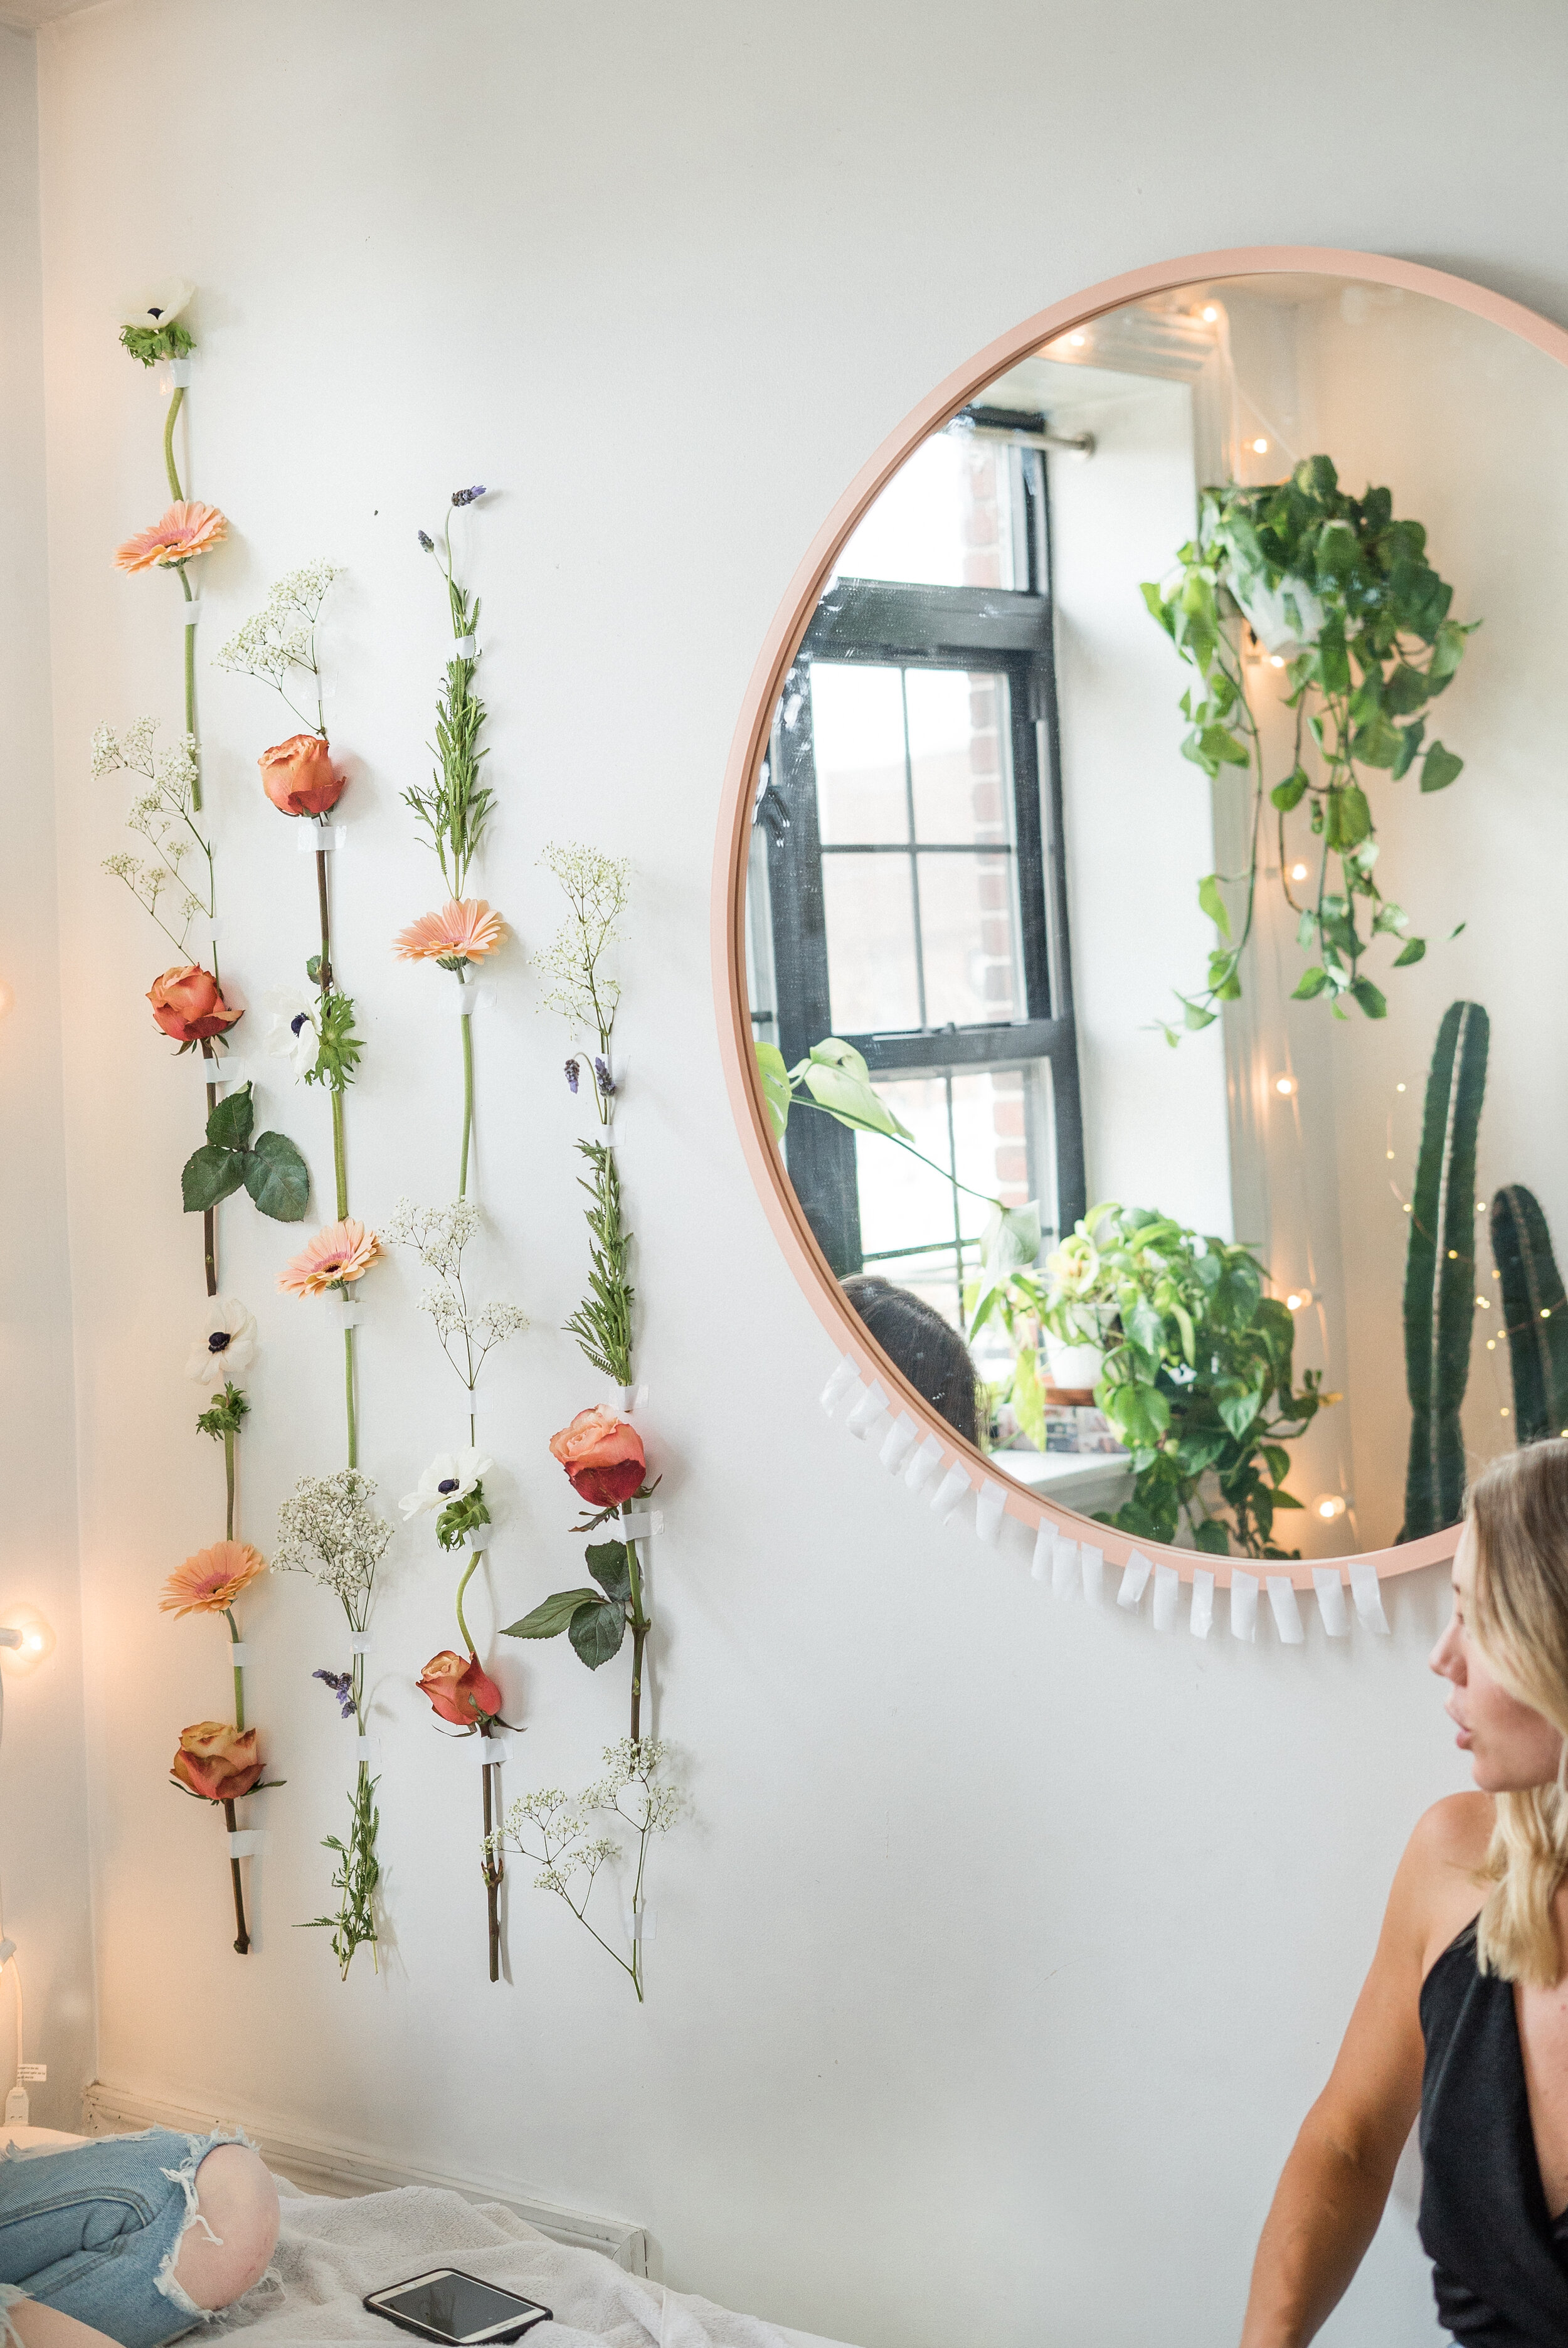
Start taping your flowers to the wall. If you don’t trust yourself on “eyeballing” the spacing, it’s best to go wider instead of closer together. You can always fill in more rows if you have left over flowers, but you don’t want to make the spacing so close together that you run out of flowers only half way through filling the wall.
If you have multiple people, I recommend you have one person cut a bunch of little pieces of tape, and have them hanging off the edge of a surface, so the person hanging can easily grab-and-go.


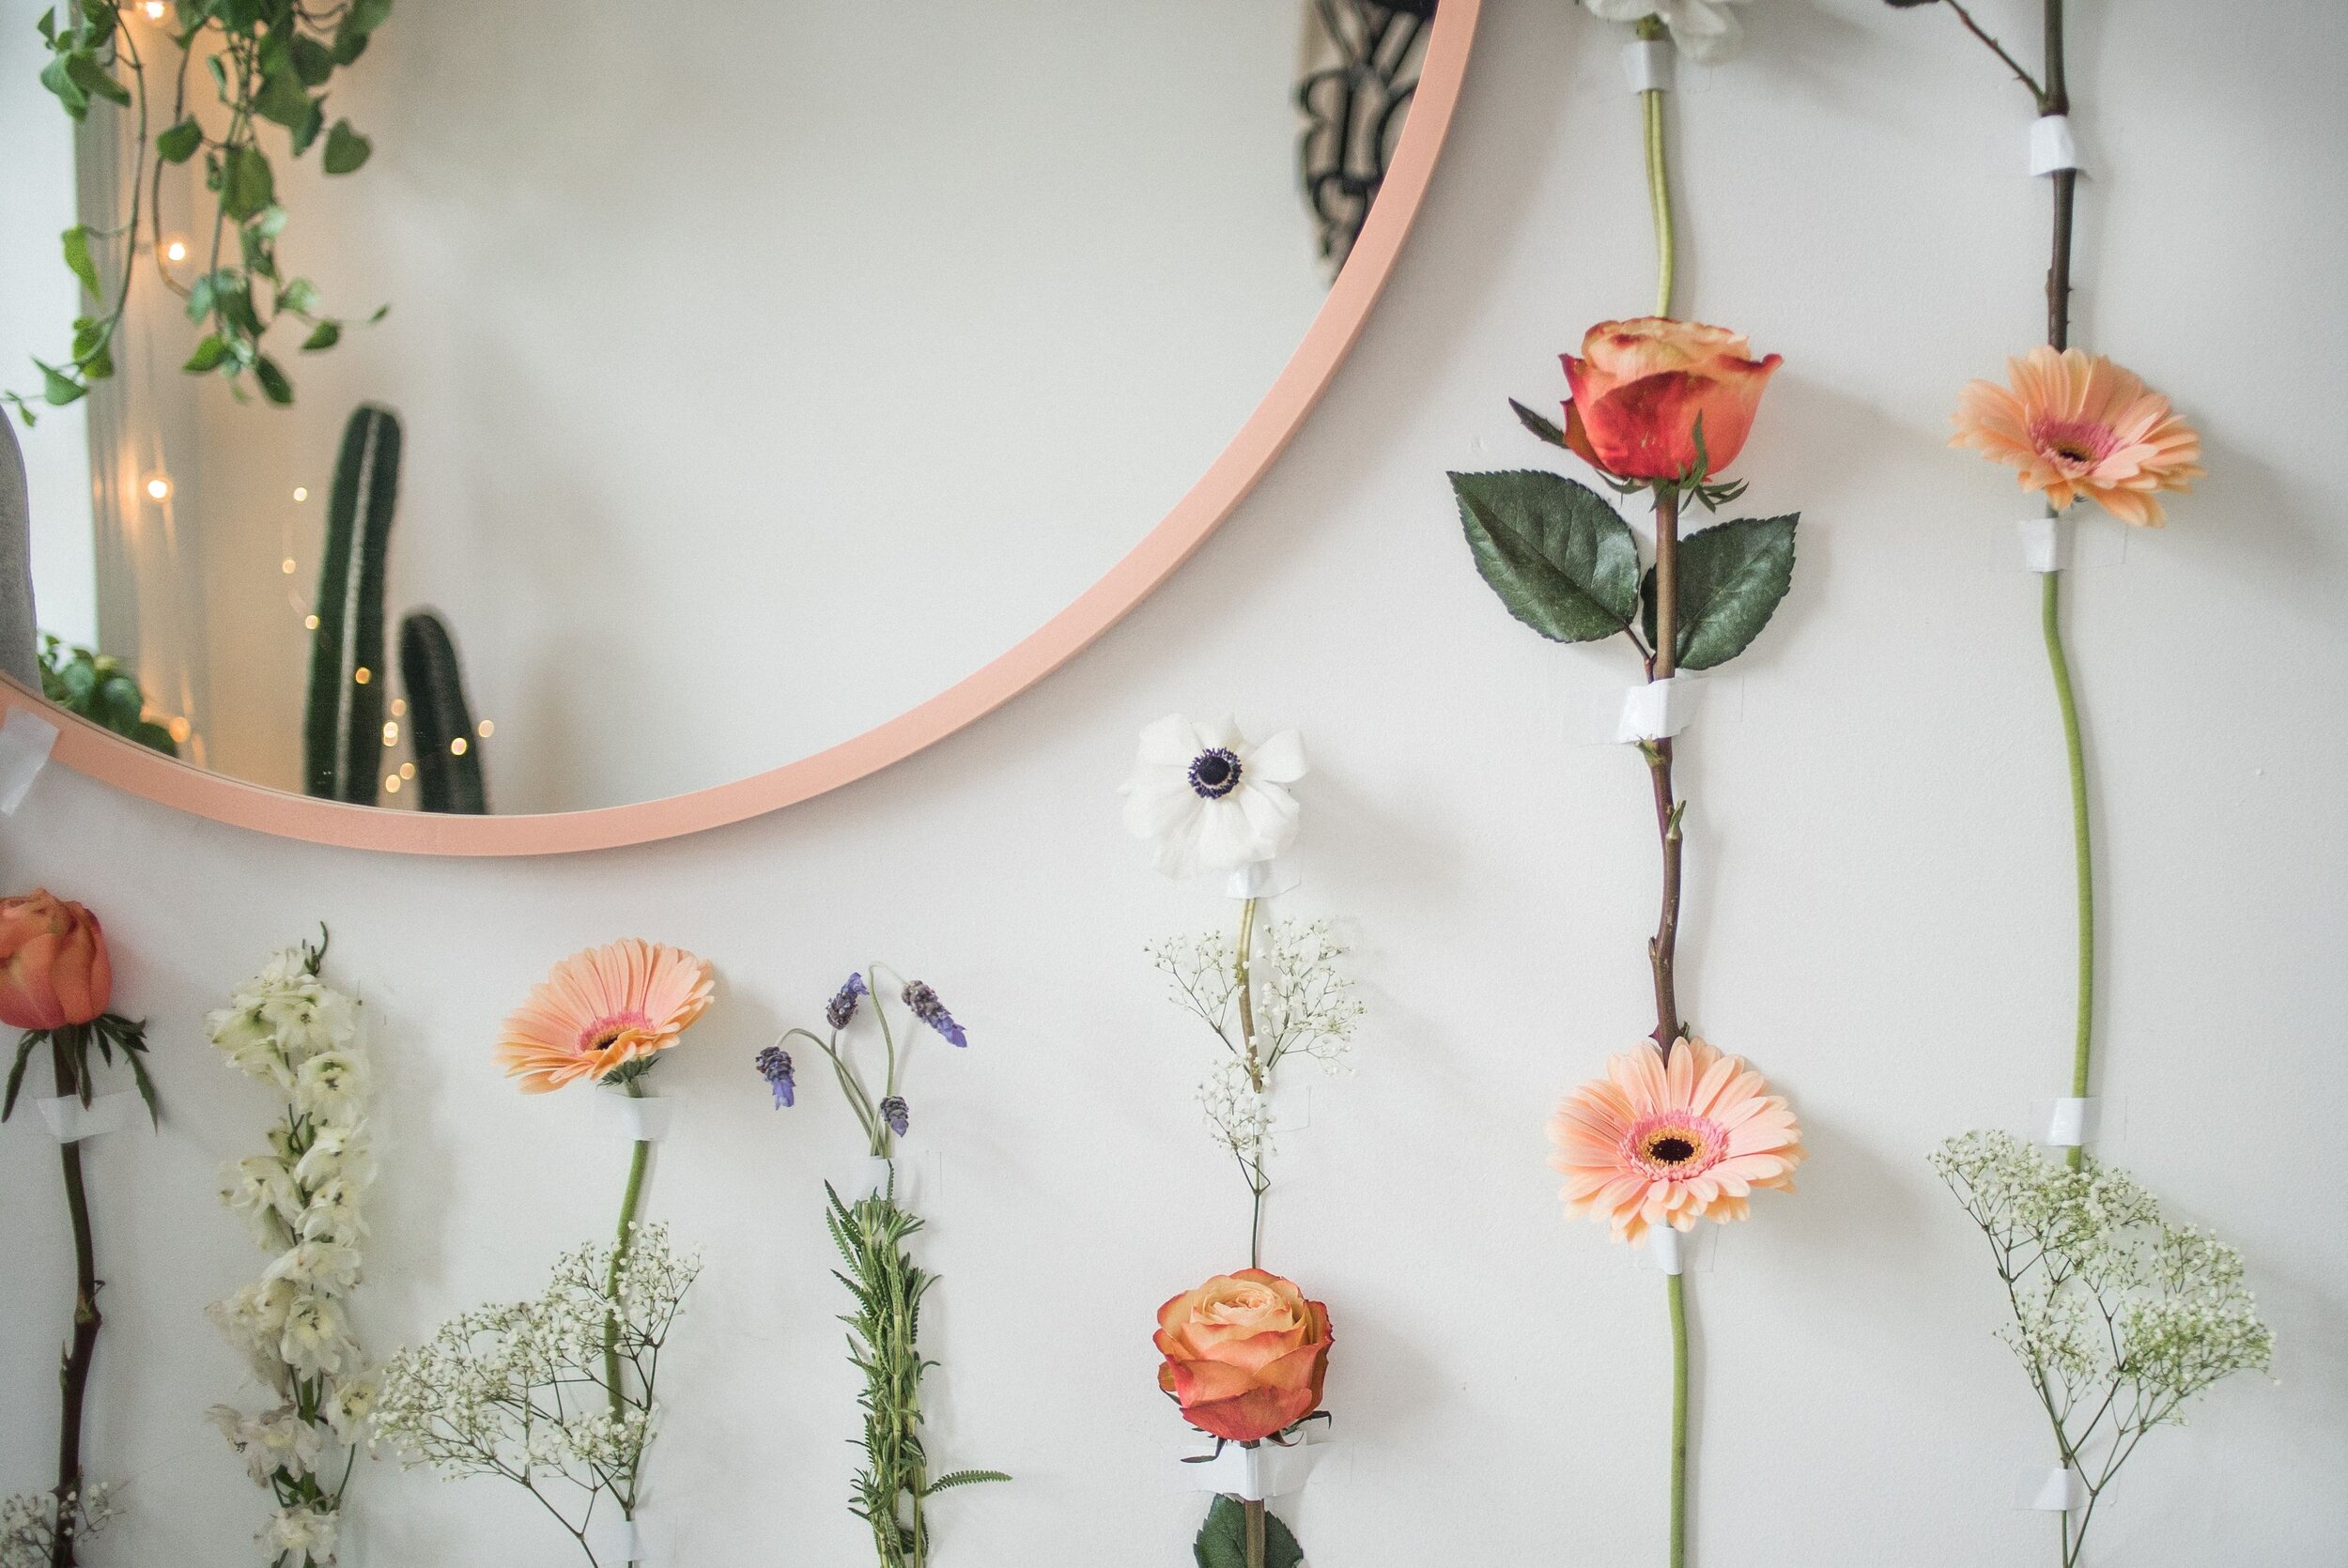
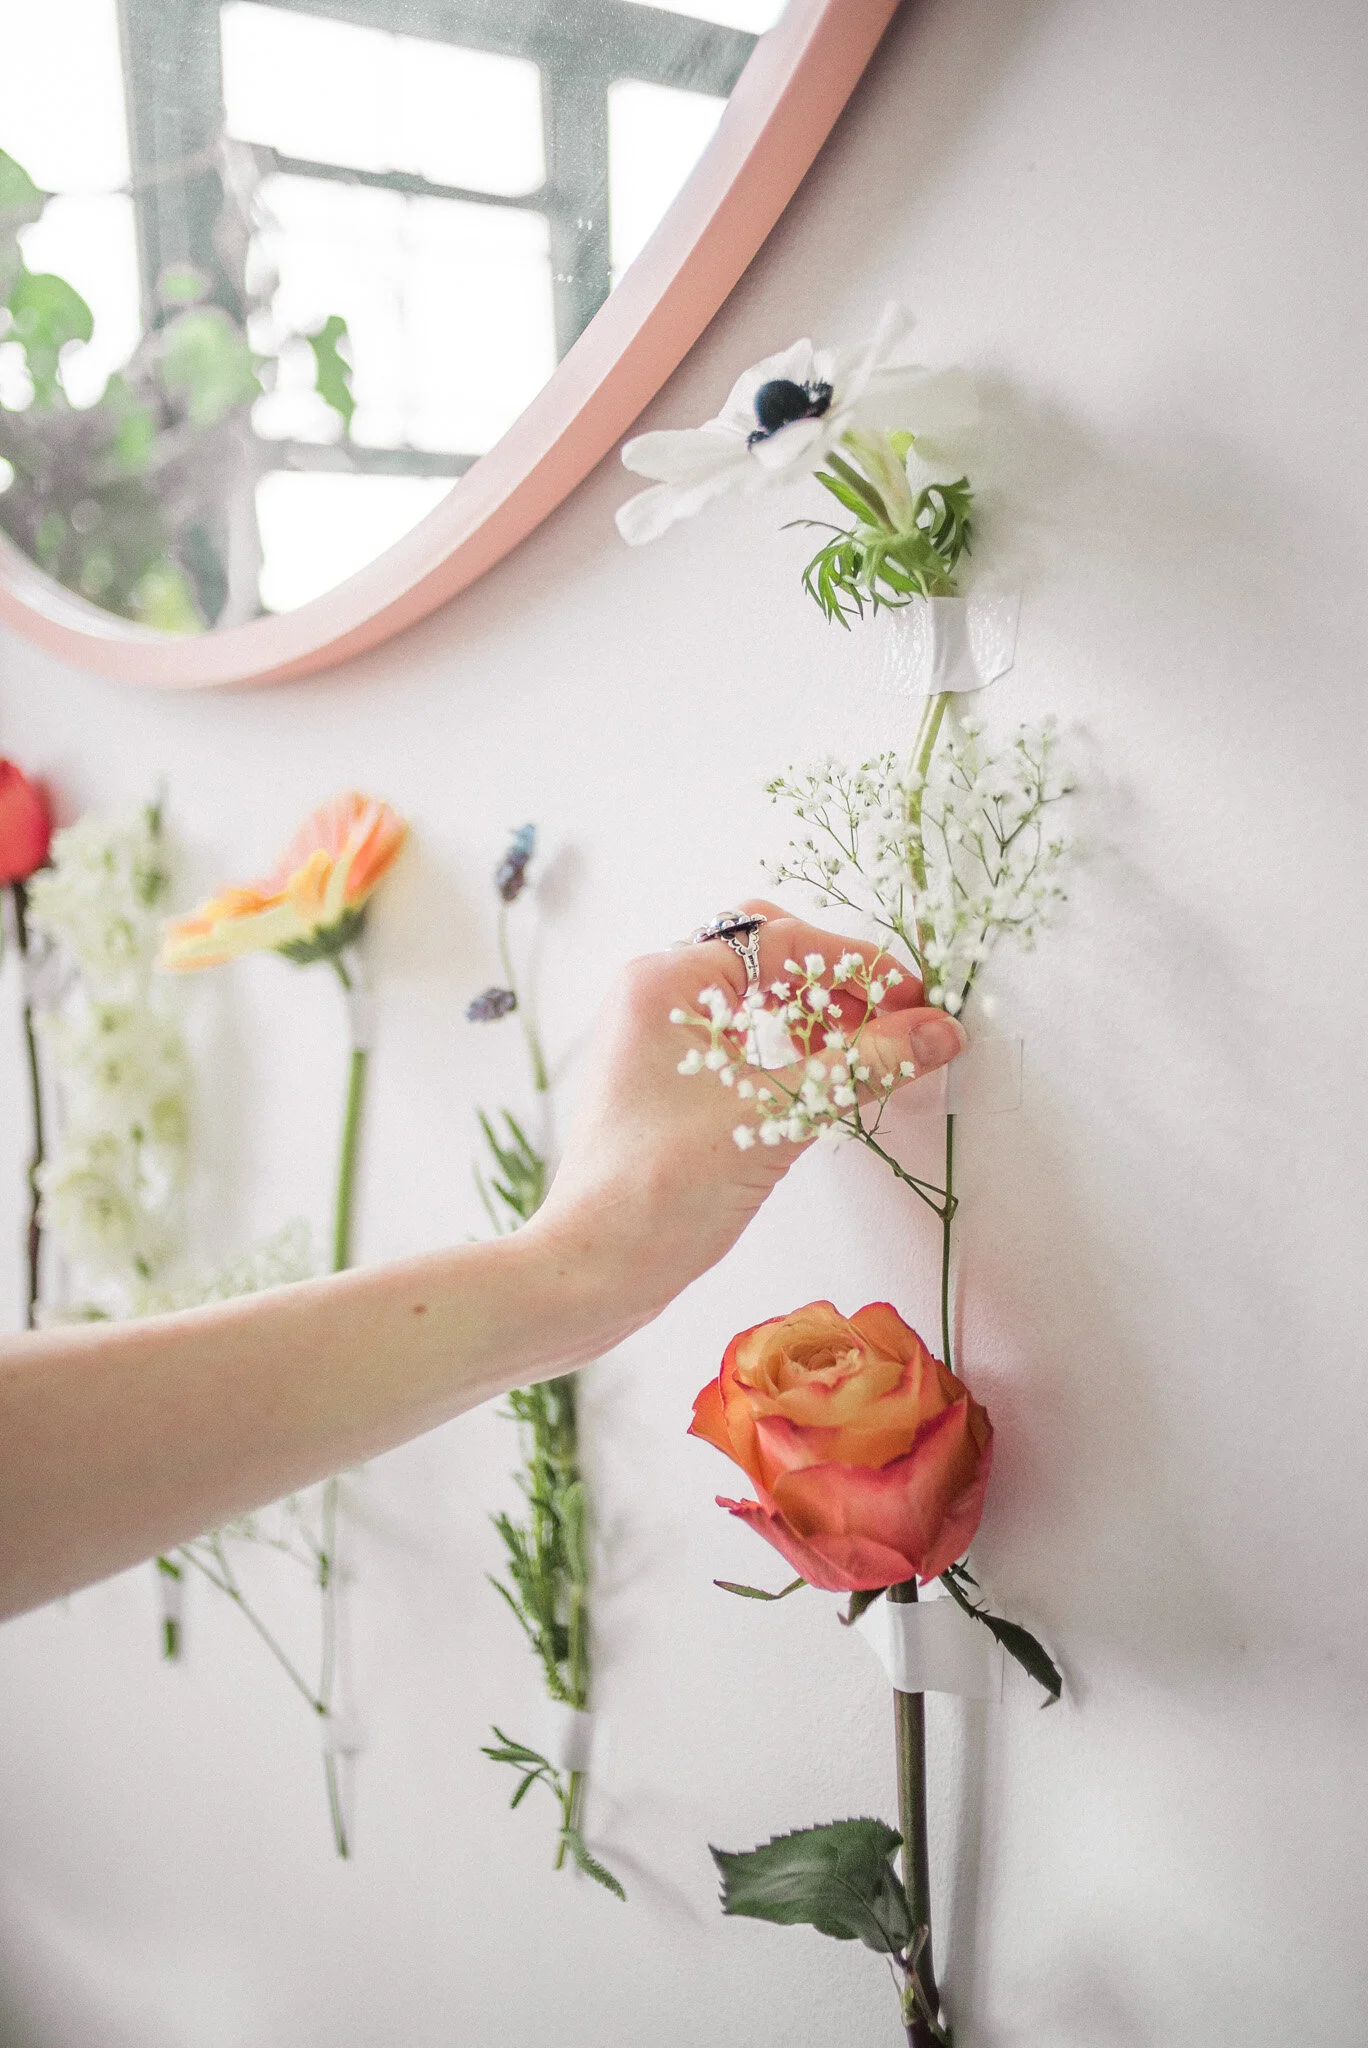
When taping the flower to the wall, it's best to use 2-3 pieces of tape to secure it and keep it from falling.
Note: The thicker and heavier the flower, the more tape you will need to use.
Tape the flower at the top of the stem, closer to the bud/petals. This way it's less likely to droop. You can also add another piece of tape closer to the bottom if necessary, or you could always tape the flowers upside-down.

STEP 3
After taping the flowers to the wall, I like to go through and add extra 'filler flowers' to make certain spaces look more full.
The best types of filler flowers are light and not heavy. Something similar to baby’s breath, lavender, thistle, or astilbe would work great, just to name a few.