How to Make a DIY Fujifilm Instax Mural
My twin sister, Caitlyn Poli and I have been able to create many fun projects for Urban Outfitters over the years so we decided to share how we made this gridded photo using Fujifilm Instax.
Follow the steps below to create your own Fujifilm Instax Mural that will make any wall in your space 'Instagrammable'. No need to spend hours Googling "How to make a gridded photo collage." Just check out all the details from this collaboration project with Urban Outfitters.
SUPPLIES NEEDED
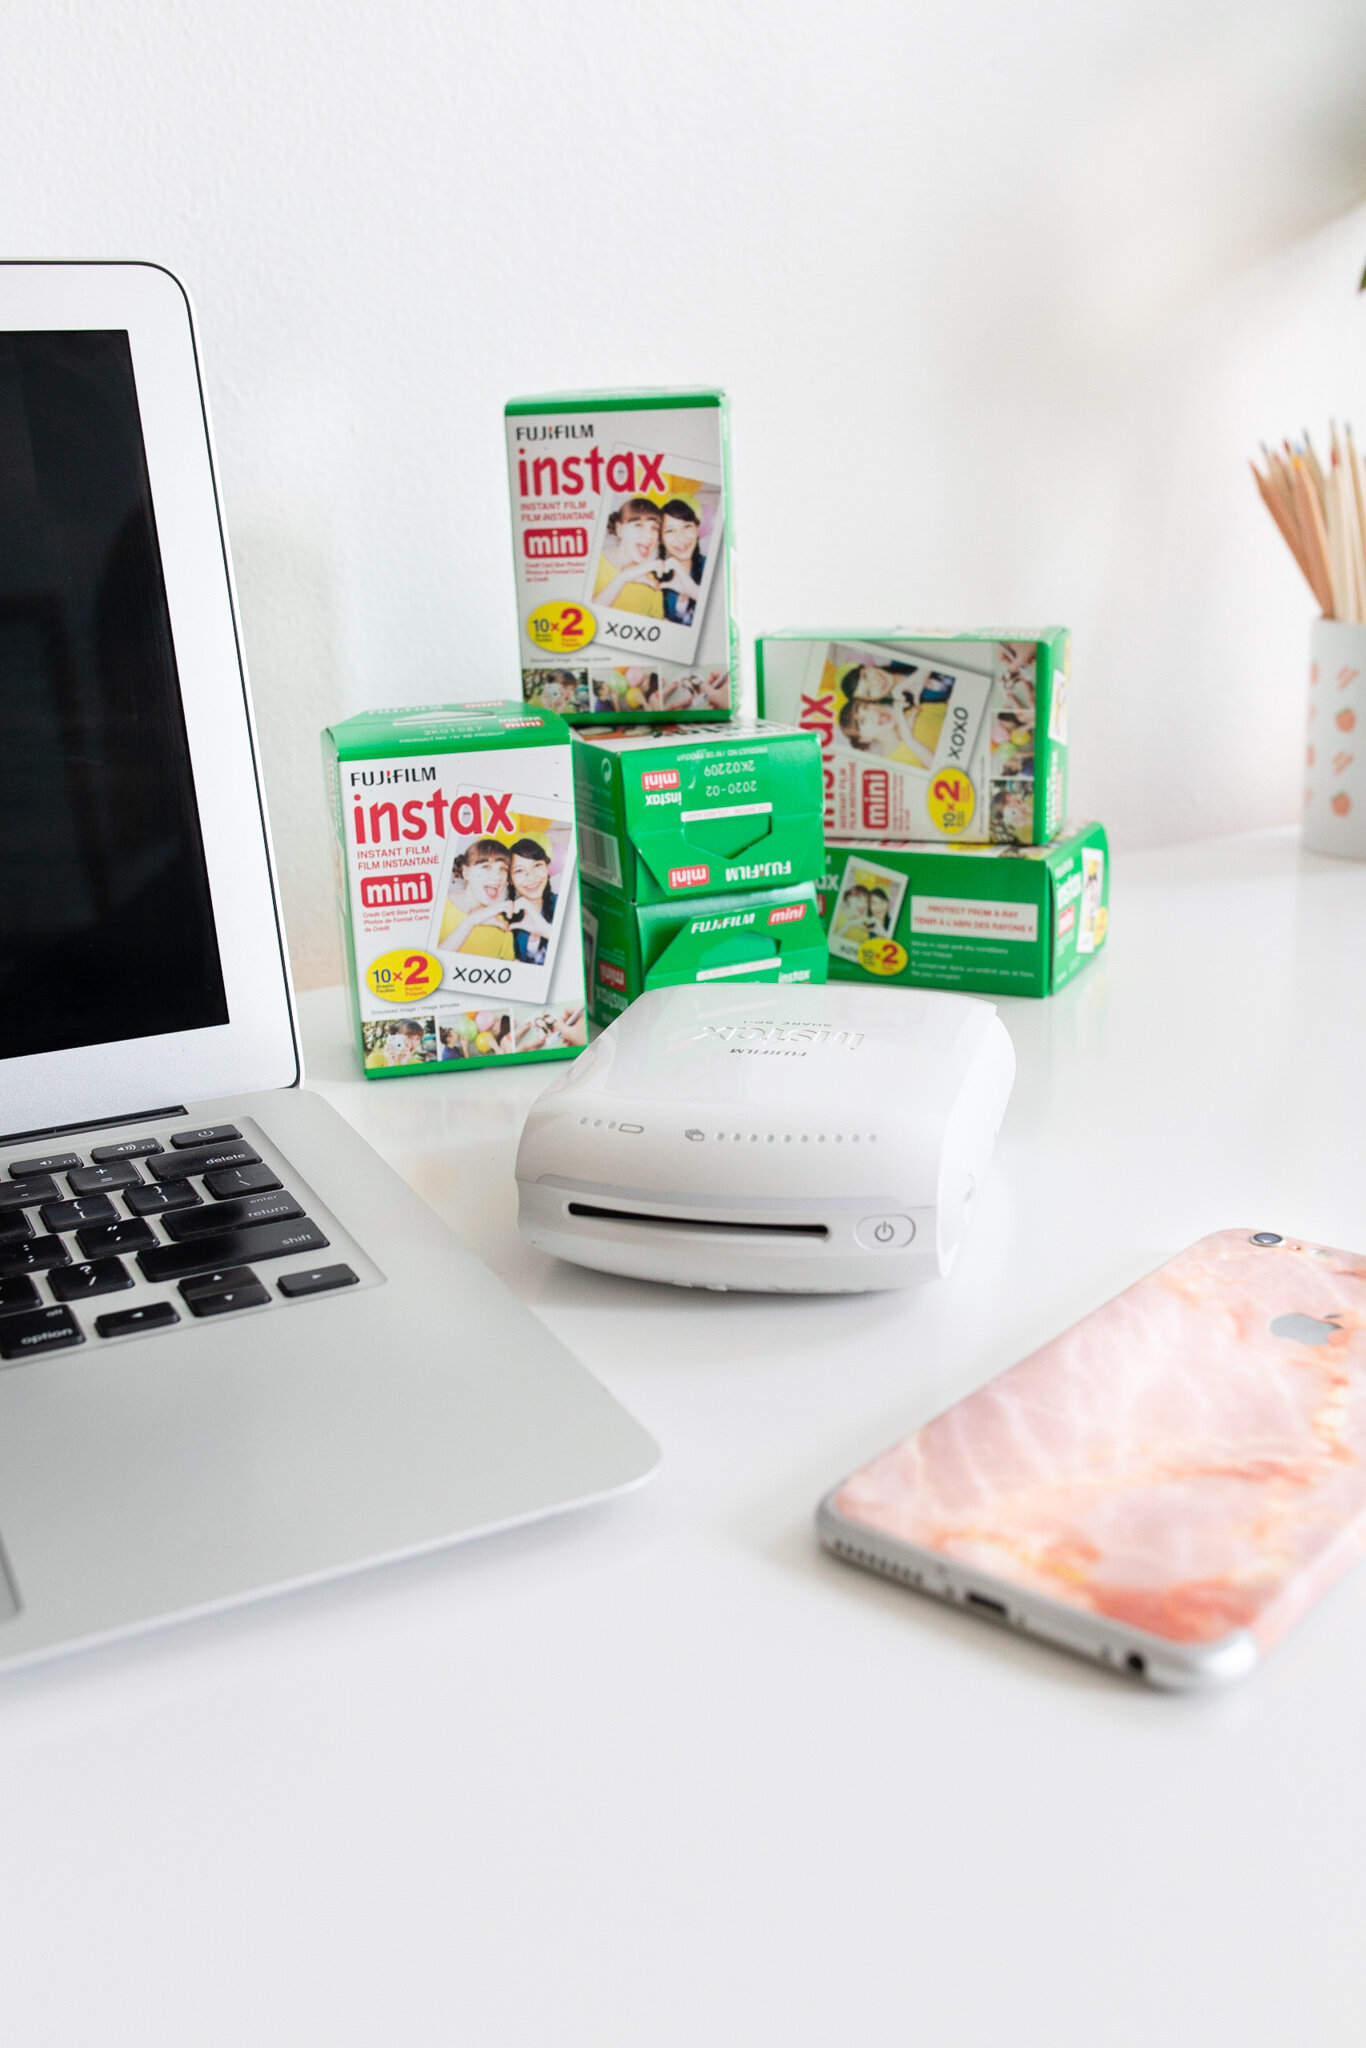
Fujifilm Instax Instant Smartphone Printer - SP-2 for $99 or SP-3 (Square 1:1 photo ratio- which makes for easier dimensions and longer battery life) for $200
Fujifilm Instax Mini Film (20 photos for $24) or Fujifilm Instax Square Film (20 photos for $24)
Tape (preferably doubled-sided)
Sharpie marker

STEP 1
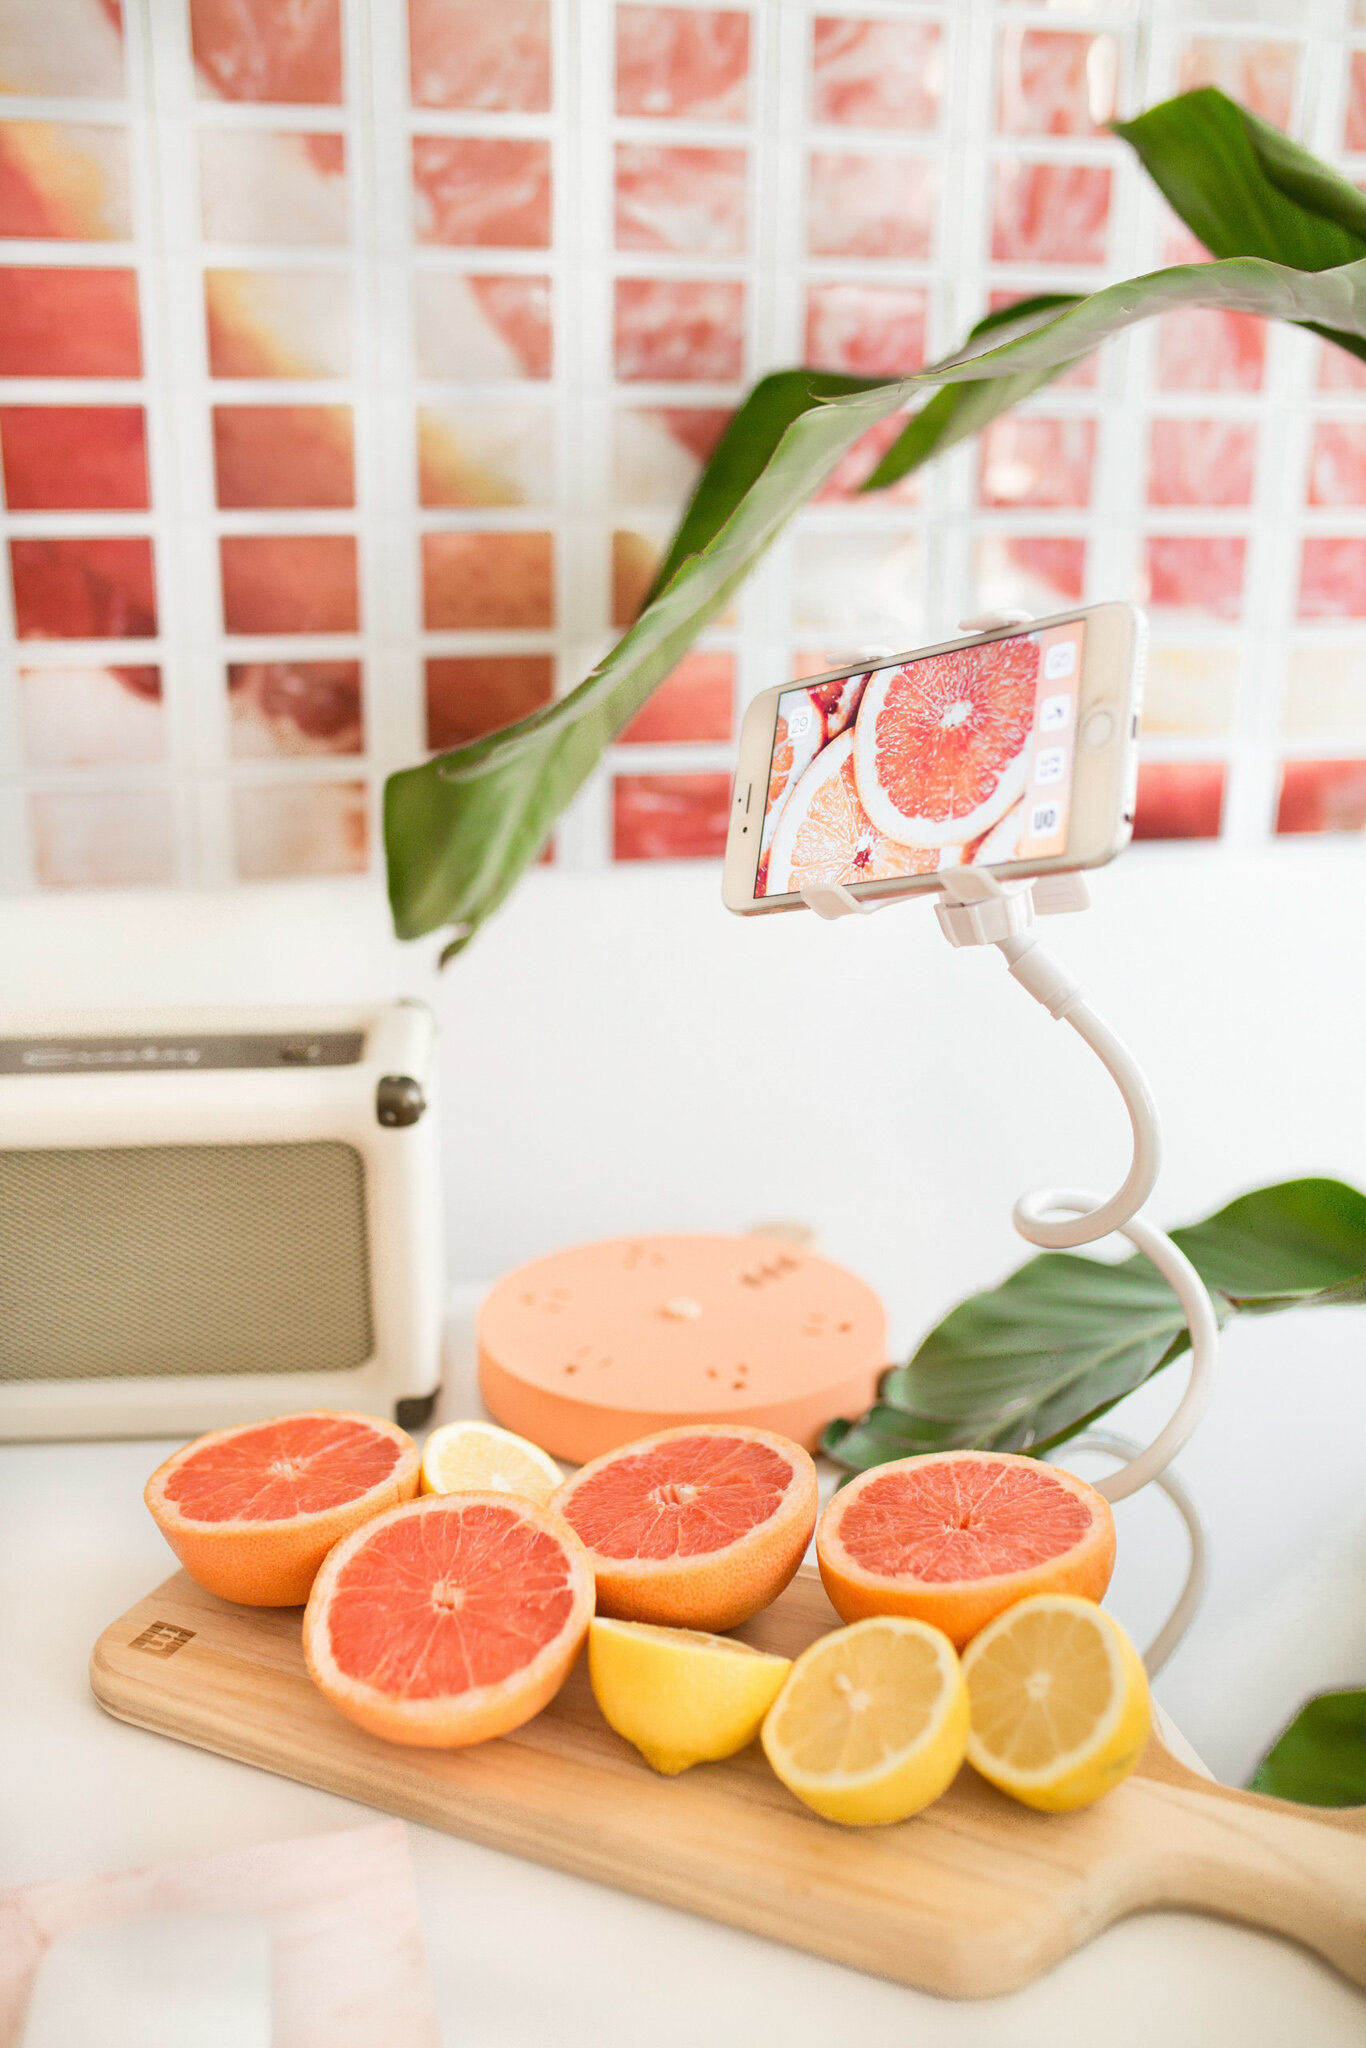
To start, think of a photo that you'd like to use for your mural.
Make sure that it's high quality (large resolution) to start, because you'll need to divide it into smaller sections to make your Instax mural, and anything too small won't be easily divided, and is more likely to be pixelated.
Something else to keep in mind is the brightness and saturation of the image since the printer tends to overexpose images. So basically, really bright or washed out images might not be the best options for your collage.
Note: The Instax Share App does have a Collage Template. These templates are designed for incorporating between two and nine images into a single print. This function can be used for various purposes such as putting memories of a special day together into a single image or for collecting together photographs on a single theme.

STEP 2
Once you've landed on the photo you want to use, you'll need to grid it out in order to print each separate frame on your Instax printer.
Each piece of the grid should be about the size of an Instax photo. This doesn't need to be entirely precise, so don't worry about getting crazy specific. We opened our image in Photoshop and then took screenshots of each individual gridded section.
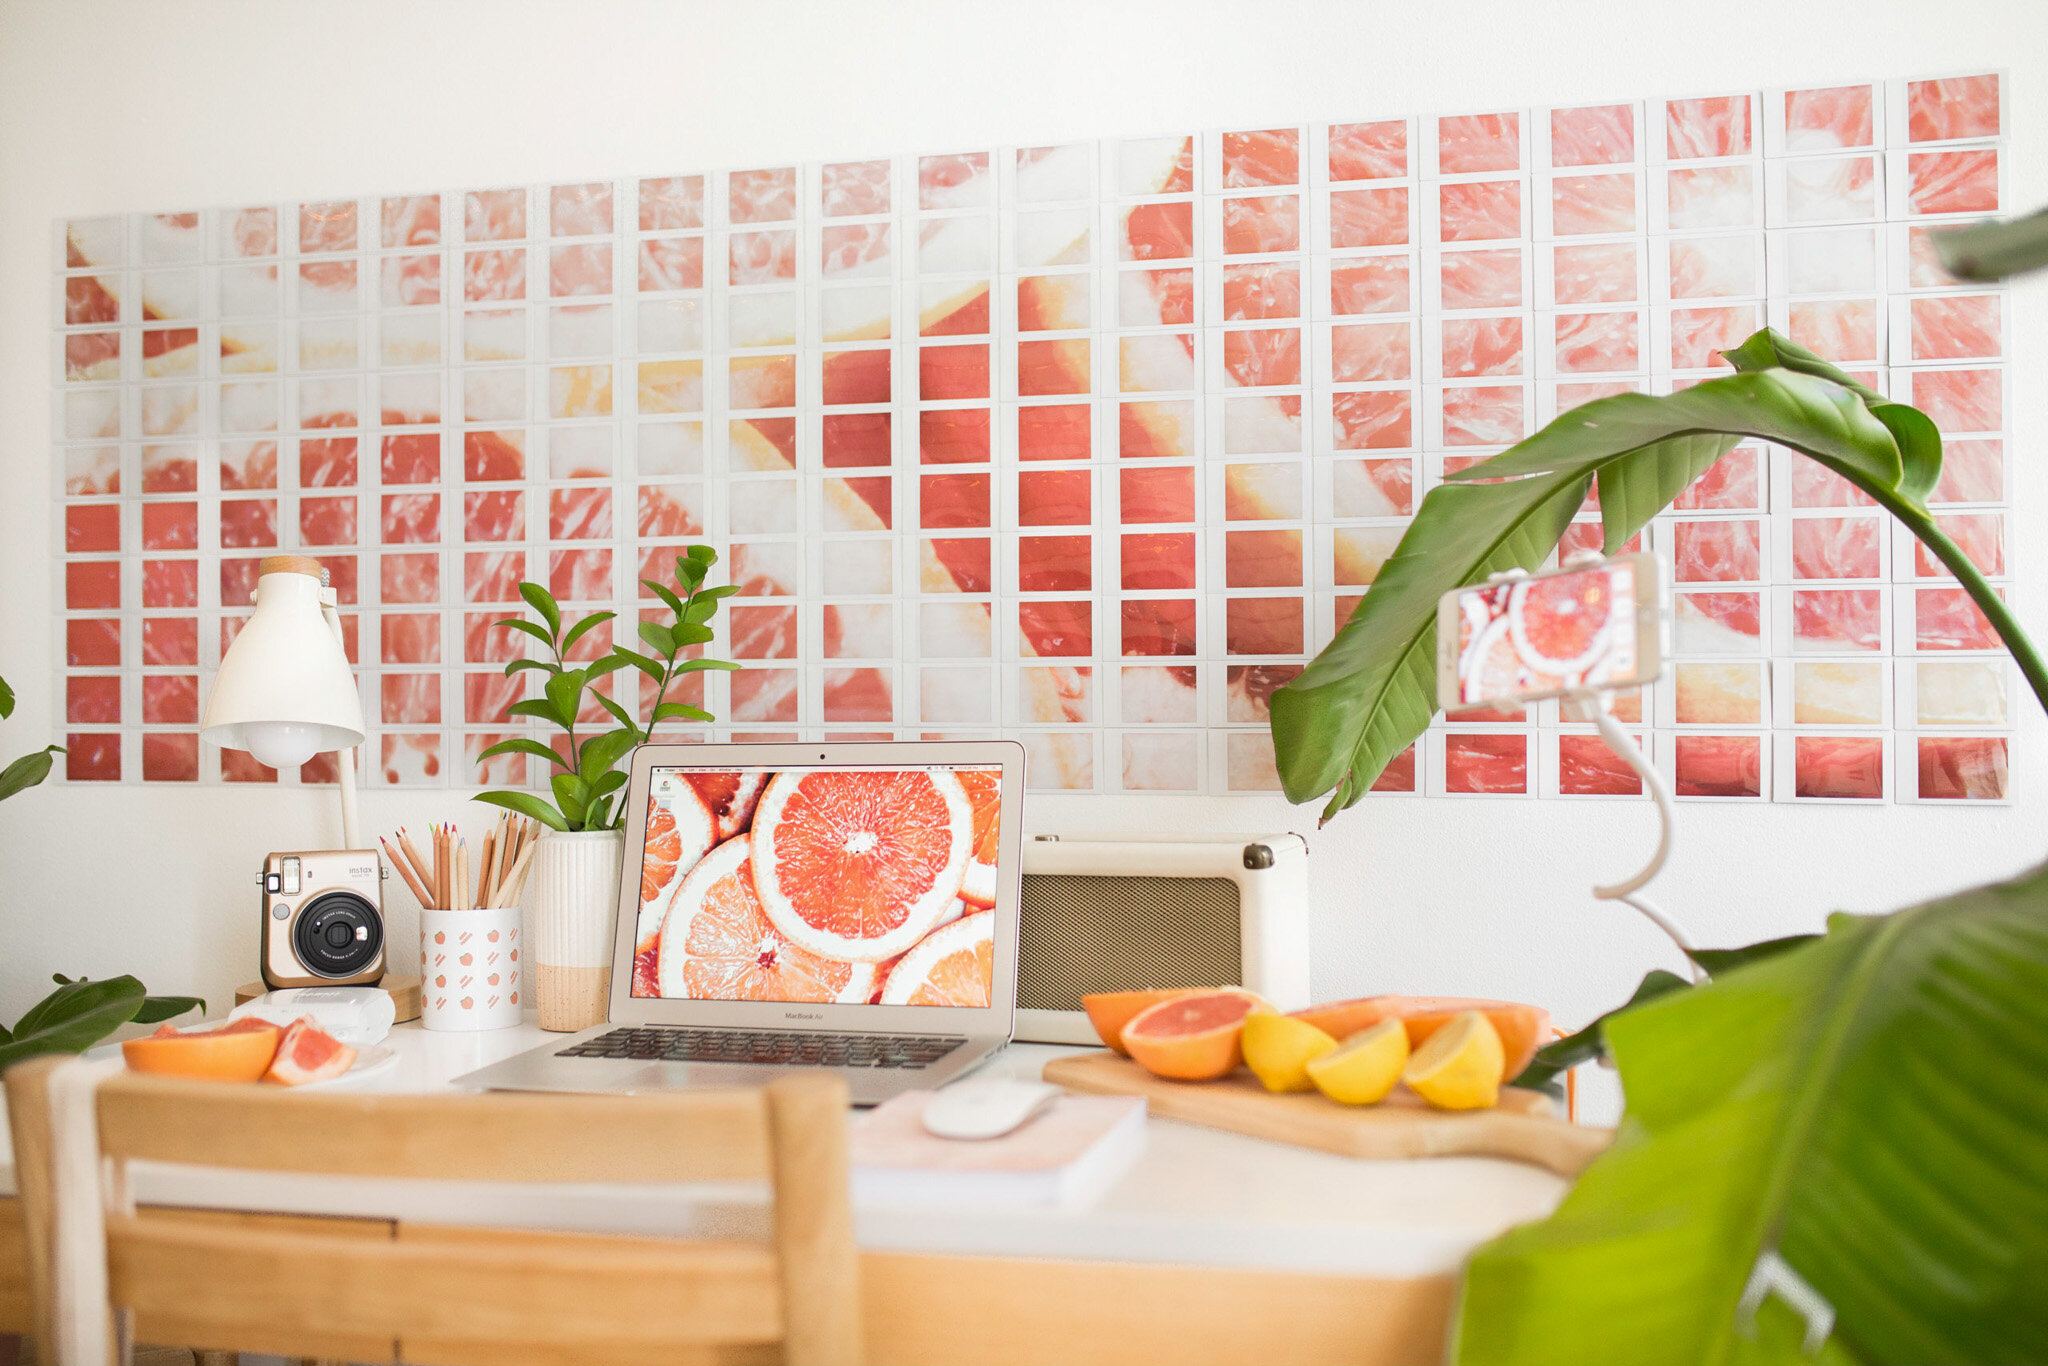
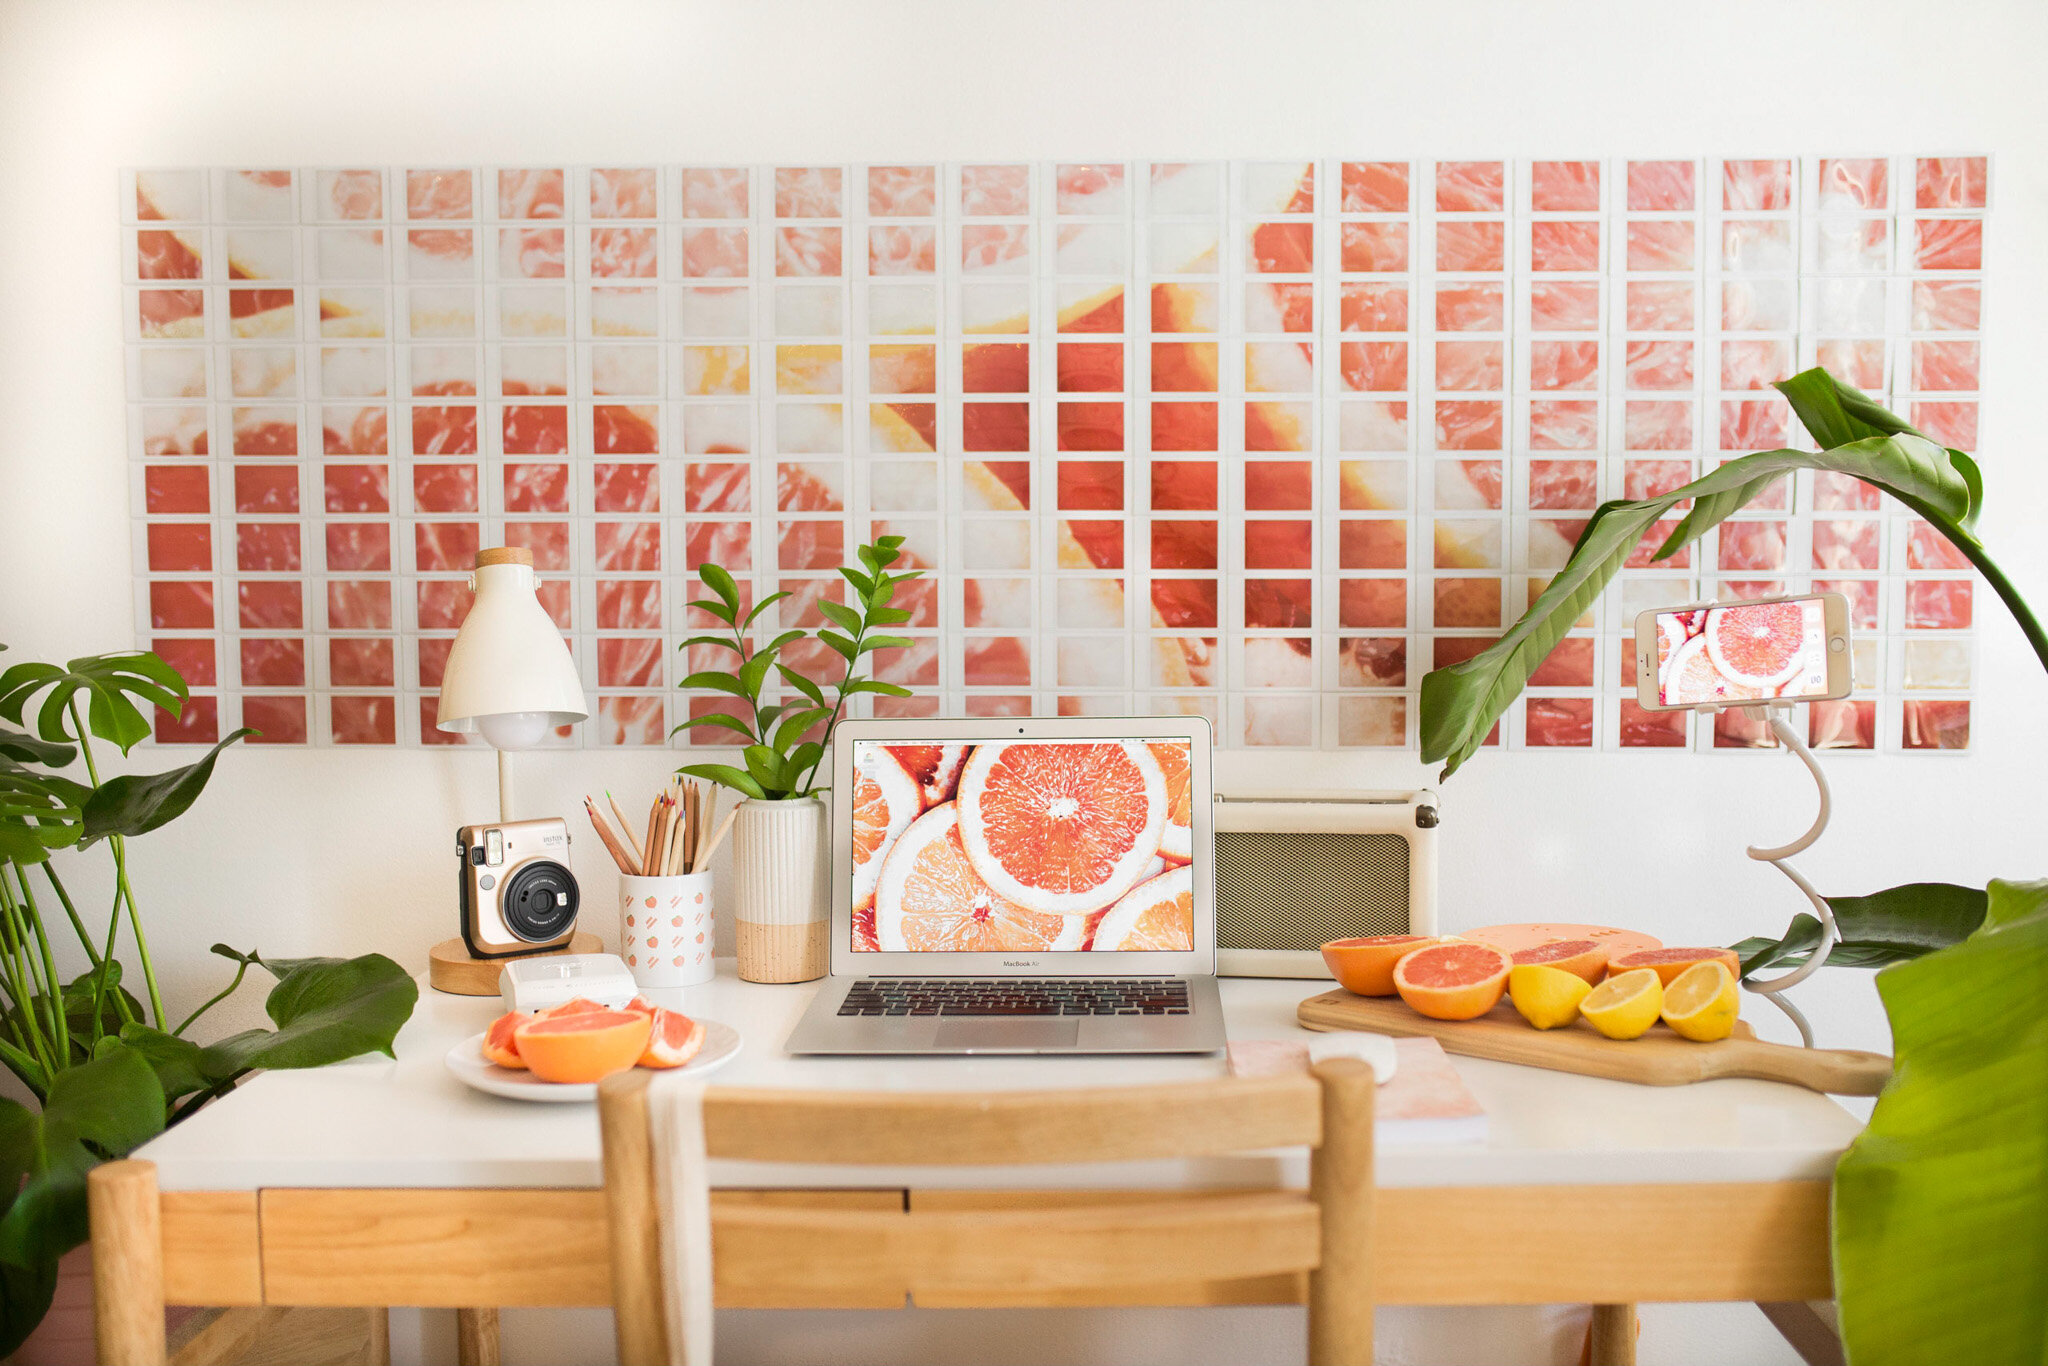
Note: Our mural is pretty big and consists of 200 Instax photos, which can get expensive. If you'd like to keep your mural on the cheaper side, try to keep your grid around 6x6 - that works out to 36 photos, or two boxes of film.

STEP 3
I suggest, as you screenshot each section in a sequential pattern (ie left to right, and making your way up), that you rename each screenshot numerically, and organize all your screenshots in a folder on your desktop. This way your screenshots are all in the correct order, making it much easier to piece the mural together.
After your photo has been screenshot into smaller images, send each image to your phone through Airdrop (in numerical order).
If you do not have both a Mac computer and iPhone then you can send each photo either to an email or Dropbox that you can access on your smartphone. (So if you did a 6x6 grid, you'll need to make sure all 36 images are emailed to you.) Unfortunately, this way will take more time, but it will still produce the same end result.

Note: I can not stress enough to make sure you send the images NUMERICALLY!

STEP 4
When you've received all your photos, open up the app that works with your Instax printer (instax SHARE) and begin printing each of them out.
You can adjust sizing in the app, but if you've screenshot all your photos to be about the size of an Instax photo, then resizing most likely won't be necessary.


Note: Sometimes the app will rotate the image when opening it, so be sure to check the image carefully before printing it out so you don't waste film on mistakes.

STEP 5
As you print each photo, be sure to keep them as orderly as you can. We recommend not only numbering them on the back as you print them out, but also, laying them out in order so that when you're ready to hang the photos they are already arranged properly.


Note: Numbering them on the back can also make it easier in case you ever plan on taking it down and putting it back up at a different time.

STEP 6
Attach to the wall with double sided tape. Luckily Instax photos are easy to hang and should stay up no problem with a single piece of tape...unless perhaps you place the mural on a wall right next to a fan or AC unit that would be regularly blowing on it.

STEP 7
Once they're all hung up, enjoy! The mural can be taken down easily - just make sure to remove the double sided tape before stacking up the Instax images for storage.